
Overview #
The IQNECT Windchill Extension enables Windchill to connect with IQNECT for semantic search, lifecycle intelligence, cross-system traceability, and analysis workflows.
The extension is installed within your Windchill environment and enables communication between Windchill and IQNECT. Once installed, administrators can configure which IQNECT environment or version should be loaded through Windchill’s Preference Management interface.
Most customers will use the default IQNECT production environment. Advanced users can optionally configure a specific IQNECT version for testing or validation purposes.
Prerequisites #
Before configuring IQNECT for Windchill:
- You have administrator access to the Windchill server.
- You have access to the Windchill file system.
- You have access to the Windchill Shell.
- You have received the IQNECT Windchill Extension package from the IQNECT team.
- Your IQNECT tenant has already been created and configured.
How the Windchill integration works #
The IQNECT Windchill Extension is installed into your Windchill environment and adds the configuration required for Windchill to communicate with IQNECT. During installation:
- The extension package is deployed into the Windchill customization directory.
- Windchill configuration files are updated.
- IQNECT preference definitions are loaded into Windchill.
- The Windchill server is restarted.
- IQNECT configuration becomes available through Preference Management.
After installation, Windchill can communicate with IQNECT and participate in cross-system lifecycle workflows.
Installing the IQNECT Windchill Extension #
Follow these steps to install the IQNECT Windchill Extension.
Download the extension package #
Download the latest IQNECT Windchill Extension package from this support page.
The package contains the files required to deploy the IQNECT Windchill integration into your Windchill environment.
Extract the package #
Extract the package into your Windchill customization root directory.
Example:
C:\PTC\customizationThe extracted files will be used during deployment.
Open the Windchill customization tools #
Open a Windchill Shell and navigate to:
<WT_HOME>/bin/customizationToolsConfigure the customization source directory #
Open:
customizationTools.propertiesLocate:
wt.customizationSource.dir.pathUpdate the value to point to the directory where the IQNECT extension package was extracted.
Example:
wt.customizationSource.dir.path=C:\PTC\customizationSave the file.
Deploy the customization #
From the Windchill Shell, run:
ant deployThis applies the required configuration changes to the Windchill environment.
Load IQNECT preference definitions #
After deployment completes, run:
ant load.dataThis loads the IQNECT preference definitions into Windchill.
Restart Windchill #
Restart the Windchill server by running:
ant wnc.restartThe installation is now complete.
Configuring IQNECT settings #
After installation, configure the IQNECT integration settings.
Open Preference Management #
In Windchill, navigate to:
Browse → Site → Utilities → Preference Management
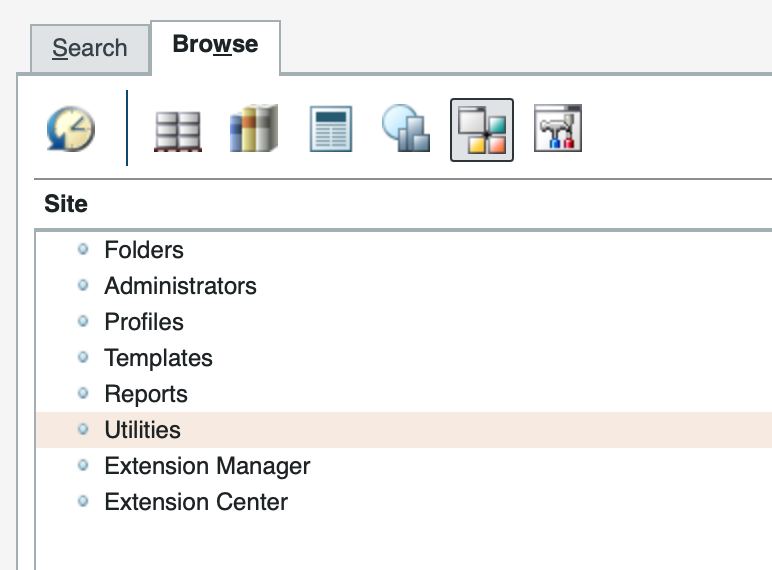
If the installation was successful, an IQNECT section will be available.
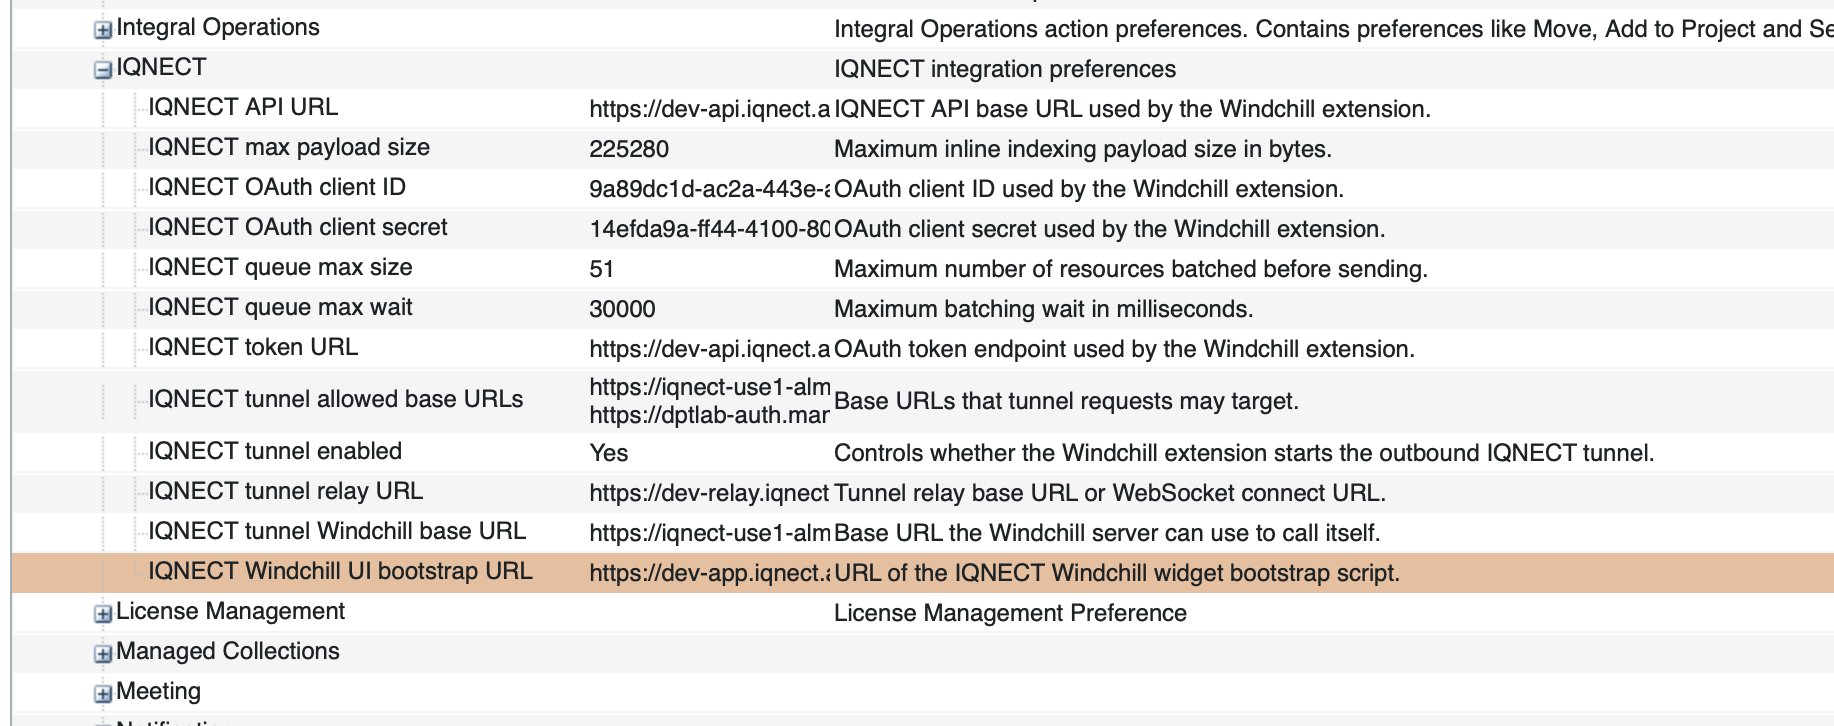
Open the IQNECT preferences #
Expand the IQNECT preference category.
The preferences allow administrators to configure how Windchill connects to IQNECT.
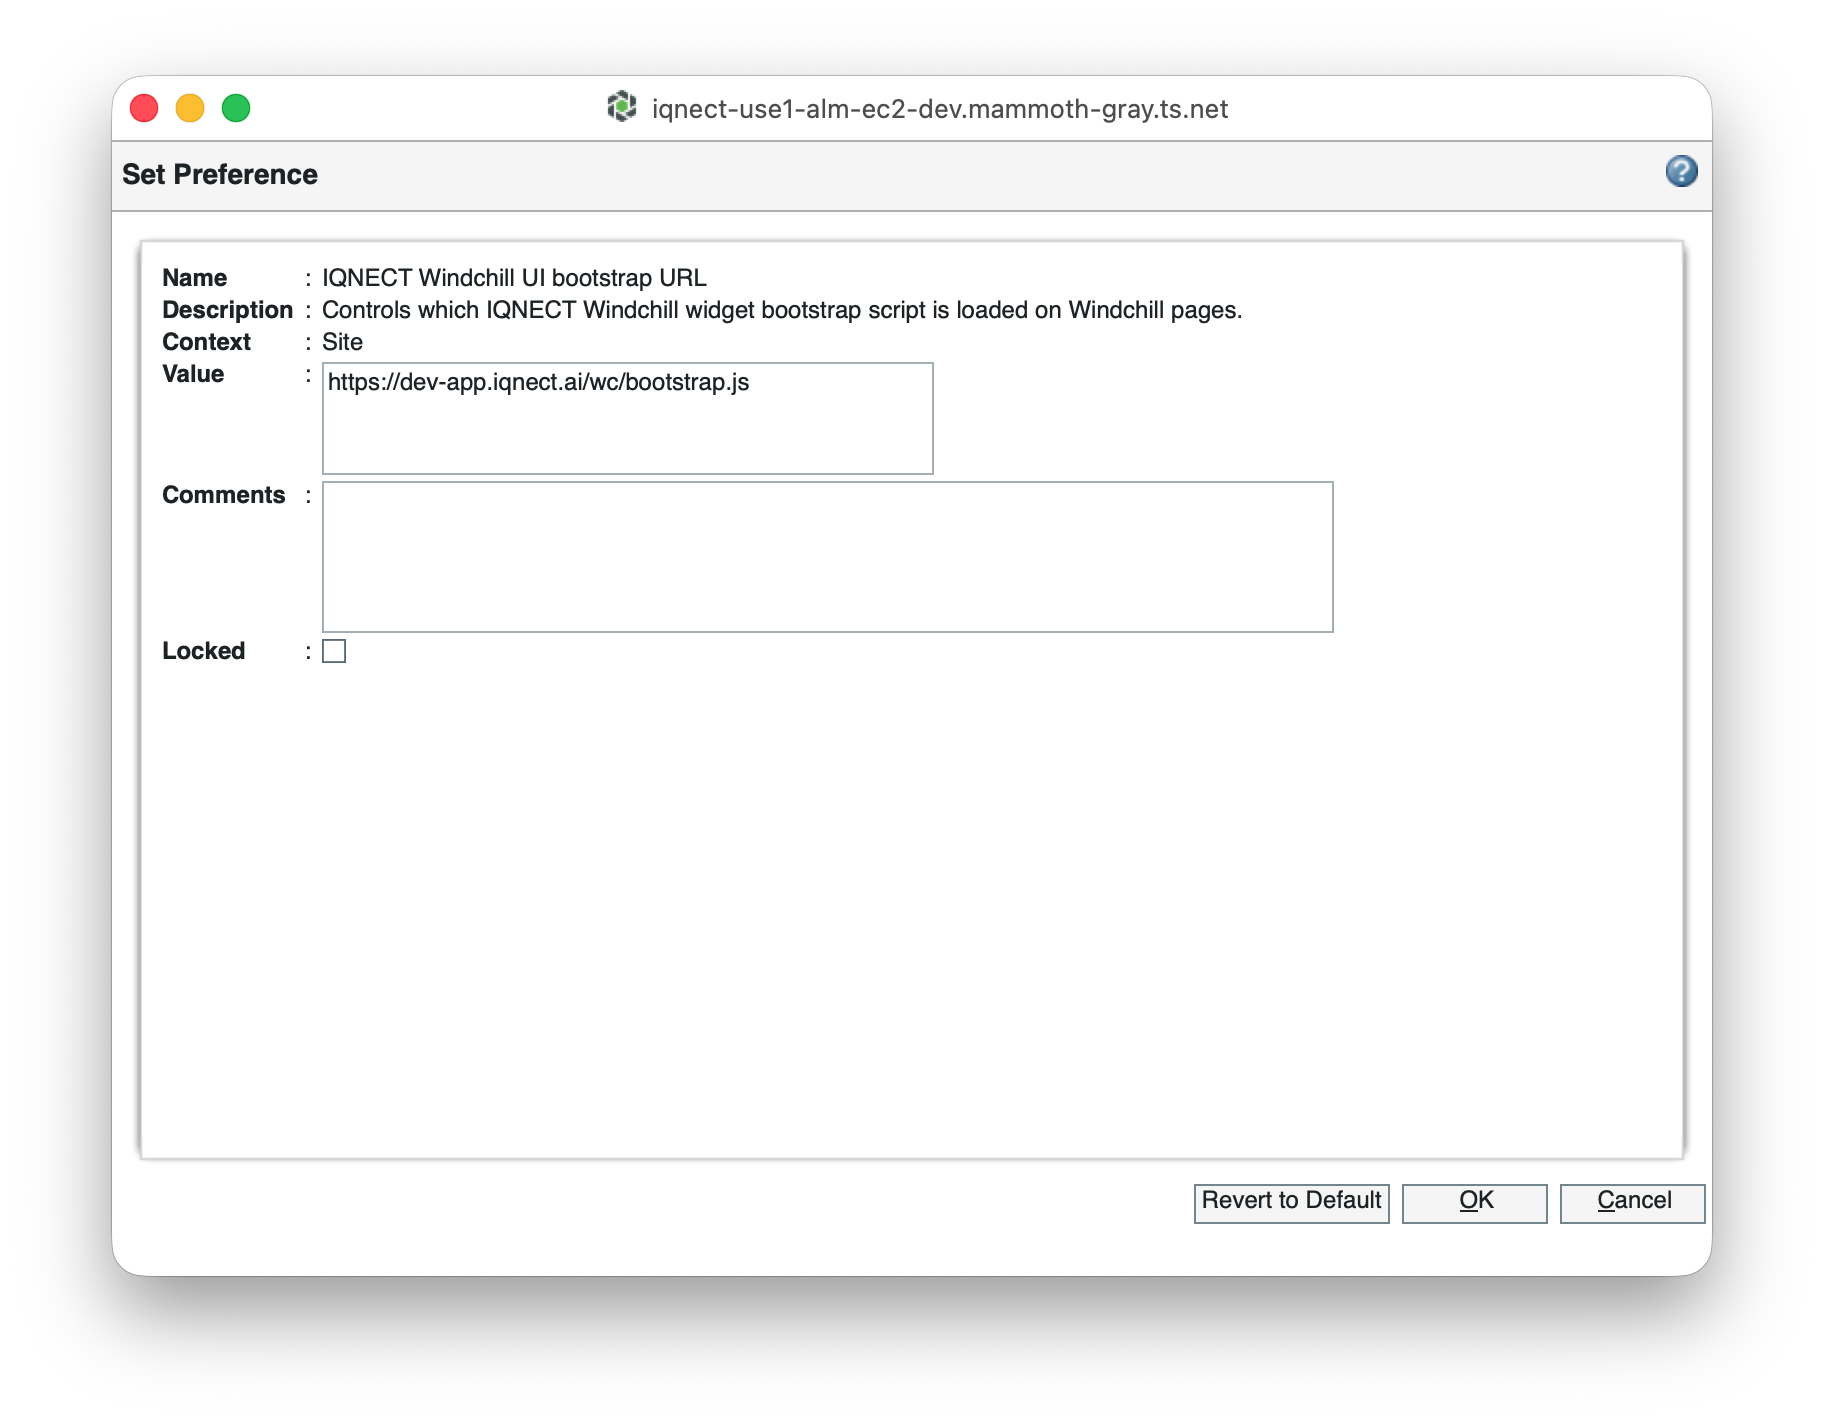
How to configure the Bootstrap URL #
The Bootstrap URL determines which IQNECT version is loaded within Windchill.
Review the Bootstrap URL setting #
Locate the following preference:
| Setting | Value |
|---|---|
| Preference | IQNECT Windchill UI Bootstrap URL |
| Preference Key | /ai/iqnect/integration/windchill/uiBootstrapUrl |
| Scope | Site |
| Default Value | https://app.iqnect.ai/wc/bootstrap.js |
The default value automatically loads the current production version of IQNECT.
Configure a specific version (Optional) #
Most customers should leave the default value unchanged. However, you can specify a different IQNECT deployment when:
- Testing a new release
- Validating functionality in a non-production environment
- Running controlled rollout scenarios
Enter the desired bootstrap URL and save the preference.
Save the configuration #
Save your changes within Preference Management.
The updated configuration will be used the next time the IQNECT interface loads within Windchill.
Configure IQNECT Controls Properties #
IQNECT uses a custom property to store and display IQNECT controls information within Windchill objects.
The property must be created and added to the appropriate Windchill object types before IQNECT controls can be displayed.
Create the IQNECT Controls property #
Open the Types and Attributes Manager within Windchill.
Create a new local property named:
iqnect-controlsor
iqnect_controlsThe property must be added to the following object types:
- WTPart
- WTDocument
- EPMDocument

Resolve property creation errors #
In some environments, Windchill may display a database error when creating the local property.
If this occurs:
- Open Types and Attributes Manager.
- Create a new global property named:
iqnect_controls- Create the local property for each object type.
- Configure the local property to reference the previously created global property.
This allows the property to be reused across multiple Windchill object types.
Configure table views #
After the property has been created, configure the appropriate Windchill table views.
Add the iqnect_controls property as a column in any tables where IQNECT controls information should be displayed.
Common locations may include:
- WTPart tables
- WTDocument tables
- EPMDocument tables
Configure the display name #
You may configure any display name that aligns with your organization’s naming standards.
Examples include:
- IQNECT Controls
- Controls
- AI Controls
- Lifecycle Controls
The display name only affects how the column appears within Windchill and does not impact IQNECT functionality.
Verifying the installation #
Follow these steps to confirm the integration is working correctly.
Confirm the IQNECT preference category exists #
Navigate to:
Browse → Site → Utilities → Preference Management
Verify that the IQNECT preference category is visible.
Verify the Bootstrap URL #
Open the IQNECT preferences and verify that the Bootstrap URL contains the expected value.
Validate the integration #
Open Windchill and access an area where the IQNECT integration is available.
Verify that:
- IQNECT loads successfully.
- The IQNECT menu and controls are displayed.
- No connectivity or configuration errors are shown.
Results and next steps #
You’ve successfully installed and configured the IQNECT Windchill Extension.
Windchill can now connect to IQNECT and participate in semantic search, lifecycle intelligence, cross-system traceability, and engineering collaboration workflows.
Future IQNECT updates can be deployed by installing an updated IQNECT Windchill Extension package and repeating the deployment process.